2K Clear Coat Instructions
Understanding 2K Clear Coat
2K clear coat, also known as 2-component clear coat, stands as one of the most critical components in the automotive painting process. Its name derives from the fact that it's composed of two distinct components: a clear resin and an activator. These two components remain separate until it's time for application, at which point they're mixed. This chemical reaction results in a robust, long-lasting protective layer for automotive finishes.
The key advantage of a 2K clear coat lies in its durability. It stands as a formidable shield against a range of hazards, including UV rays, oxidation, and various environmental elements. This means that the vehicle's finish is not only protected but will maintain its pristine appearance over an extended period.
Furthermore, 2K clear coat delivers a high-gloss finish, often described as a "showroom shine." This enhances the vehicle's appearance, making it look brand new. In addition to aesthetics, the clear coat provides chemical resistance against substances like fuel, oil, and various solvents, which can otherwise corrode or damage the paint. Moreover, 2K clear coat is highly scratch-resistant, guarding the paint against everyday wear and tear, ensuring your vehicle looks stunning for years to come.
Lastly, the color stability offered by 2K clear coat ensures that the underlying paint maintains its vibrancy and brilliance. It prevents fading or yellowing over time, further emphasizing the longevity of this product.
Benefits of Using 2K Clear Coat
The benefits of using 2K clear coat extend well beyond its protective qualities. This section will delve deeper into the advantages it offers:
First and foremost, the durability of 2K clear coat is unparalleled. It acts as a formidable shield against UV rays, oxidation, and a range of environmental factors, ensuring that your vehicle's finish remains unblemished for an extended period. This translates to a cost-effective solution for anyone looking to maintain the appearance of their vehicle over time.
The high-gloss finish provided by 2K clear coat is a showstopper. It doesn't just protect the underlying paint; it enhances it. A well-applied 2K clear coat can make your vehicle look showroom-ready, giving it that coveted "new car" shine. This is a significant advantage for auto enthusiasts, paint shop owners, and anyone who takes pride in their vehicle's appearance.
Chemical resistance is another critical benefit. Your vehicle often comes into contact with substances like fuel, oil, and solvents, all of which can corrode or damage the paint over time. 2K clear coat acts as a barrier, ensuring that these chemicals don't harm the finish. This is especially important for those who use their vehicles for work or frequently encounter harsh environments.
Moreover, 2K clear coat excels in scratch resistance. Everyday wear and tear can lead to unsightly scratches on your vehicle's surface. With 2K clear coat, you're adding an extra layer of protection that significantly reduces the risk of scratches. This is particularly valuable for those who live in urban environments or frequently park in tight spaces.
Lastly, color stability is a hallmark of 2K clear coat. Over time, paint can fade or turn yellow, diminishing the overall aesthetic appeal of your vehicle. 2K clear coat acts as a guardian, preserving the vibrancy and brilliance of the underlying paint. This means your vehicle will continue to turn heads for years to come.
In conclusion, the benefits of using 2K clear coat extend far beyond mere protection. It's an investment in the longevity and aesthetic appeal of your vehicle, offering superior durability, a high-gloss finish, chemical and scratch resistance, and unparalleled color stability. Whether you're an import wholesaler, paint shop owner, or repair center manager, incorporating 2K clear coat into your automotive finishing process is a wise decision that will result in satisfied customers and vehicles that stand the test of time.
Preparing the Surface for 2K Clear Coat Application
Properly preparing the surface is a critical step to ensure the successful application of 2K clear coat. Neglecting this step can lead to poor adhesion, uneven finishes, and reduced durability. Here's a detailed look at the crucial aspects of surface preparation:
1.Surface Cleaning: Before applying 2K clear coat, it's imperative to thoroughly clean the surface. Any contaminants such as dust, dirt, wax, or grease can interfere with the adhesion of the clear coat. Start by washing the surface with a high-quality automotive detergent. Rinse it thoroughly to ensure all residue is removed. For a final touch, use a dedicated wax and grease remover to eliminate any remaining contaminants.
2.Sanding and Smoothing: Surface imperfections and rough spots should be addressed through sanding. Begin with a coarser grit sandpaper to level out imperfections, and then progressively move to finer grits for a smoother finish. Pay special attention to areas with scratches, chips, or uneven surfaces. Ensure that you feather the edges of any repaired areas to create a seamless transition.
3.Tack Cloth Use: After sanding, it's essential to remove any dust or particles from the surface before applying the clear coat. A tack cloth is the tool of choice for this task. Gently wipe the entire surface to ensure it's free from any debris. Be thorough, as even tiny particles can create imperfections in the clear coat.
By diligently following these preparation steps, you'll create a clean and smooth canvas for the application of 2K clear coat. This sets the stage for a flawless finish and maximizes the durability of the coating.
Step-by-Step Instructions for Applying 2K Clear Coat
Applying 2K clear coat requires precision and attention to detail. Here's a step-by-step guide to ensure a successful application:
·Safety First: Begin by ensuring you have the appropriate safety equipment, including gloves, safety glasses, and a respirator. 2K clear coat contains chemicals that require protection.
·Mixing Ratio: Refer to the manufacturer's instructions for the correct mixing ratio of the clear resin and activator. Accuracy is crucial, as an incorrect ratio can result in subpar performance.
·Spray Gun Setup: Prepare your spray gun according to the manufacturer's recommendations. This includes selecting the appropriate nozzle size and adjusting air pressure to achieve a fine, even spray pattern.
·Test Spray: Before applying to the vehicle, practice on a test panel or an inconspicuous area to ensure the gun is properly adjusted and the mixture is spraying evenly.
·First Coat: Begin by applying a light, even coat of 2K clear coat to the vehicle's surface. Start from the top and work your way down. Overlap each pass by about 50% to ensure even coverage. Keep the spray gun moving to avoid buildup in one area.
·Flash Time: Allow the first coat to flash, or partially dry, according to the manufacturer's recommendations.
·Additional Coats: Apply 2-3 more coats of clear coat, allowing each coat to flash before applying the next. Build up the clear coat gradually for a smooth finish.
·Final Coat: For the final coat, adjust the gun for a slightly heavier application to achieve a deep, glossy finish.
·Drying Time: After the final coat, allow the clear coat to dry for the recommended time, before handling or polishing.
By following these step-by-step instructions, you can achieve a professional-quality finish with 2K clear coat, enhancing the appearance and protection of the vehicle's paint.
Common Mistakes to Avoid When Applying 2K Clear Coat
While applying 2K clear coat can yield outstanding results, it's important to be aware of common mistakes that can compromise the finish. Avoiding these pitfalls is crucial for a successful application:
1.Uneven Coats: One of the most common errors is applying uneven coats. This can result in visible variations in gloss and thickness. To prevent this, maintain a consistent spraying distance and overlap each pass by about 50% to ensure even coverage.
2.Improper Drying Times: Rushing through the drying process can lead to issues like wrinkling or solvent pop. Follow the manufacturer's recommendations for flash times between coats and the overall curing time to ensure a flawless finish.
3.Over-application: Applying too much clear coat in a single pass can lead to runs and sags. It's essential to maintain a controlled spraying technique and avoid excessive build-up.
4.Contamination: Even the smallest particles of dust or debris can ruin the finish. Ensure your work environment is clean, and use a tack cloth to remove any particles from the surface before applying clear coat.
5.Inadequate Mixing: Deviating from the recommended mixing ratio can result in clear coat that doesn't cure properly or lacks durability. Always measure and mix the components accurately.
6.Incorrect Spray Gun Setup: Using the wrong nozzle size or air pressure settings can affect the quality of the clear coat application. Refer to the manufacturer's guidelines for the proper setup.
7.Poor Surface Preparation: Skipping or rushing through surface preparation can lead to adhesion problems and defects in the finish. Take the time to clean, sand, and smooth the surface properly before applying clear coat.
8.Ambient Conditions: Extreme temperatures, humidity, or airflow can impact the clear coat application. Follow the manufacturer's recommendations regarding environmental conditions.
9.Inadequate Safety Measures: Neglecting safety precautions such as wearing appropriate protective gear like gloves, safety glasses, and a respirator can pose health risks when working with 2K clear coat chemicals.
10.Lack of Patience: Rushing through the application process can lead to a subpar finish. Take your time, follow the steps meticulously, and allow proper drying and curing times.
By being mindful of these common mistakes and taking measures to avoid them, you can significantly improve the quality of your 2K clear coat application and achieve a professional-grade finish.
Tips and Tricks for Achieving a Flawless Finish with 2K Clear Coat
Achieving a flawless finish with 2K clear coat requires not only proper technique but also some insider tips and tricks. Here are some expert recommendations to help you attain that glass-like, showroom-quality shine:
·Temperature Control: Maintain a controlled working environment with a stable temperature. Extreme temperatures can affect the curing process and the final finish.
·Spray Gun Technique: Hold the spray gun parallel to the surface and maintain a consistent distance. Keep the gun moving smoothly to avoid build-up in one spot. Adjust the gun for a fine fan pattern to ensure even application.
·Wet Sanding: For the smoothest finish, consider wet sanding between coats with fine-grit sandpaper (e.g., 1500-2000 grit). This helps remove any imperfections and promotes adhesion between layers.
·Blending: When applying clear coat to a repaired area, blend the clear coat slightly beyond the repair boundary to create a seamless transition between old and new paint. This helps eliminate visible lines.
·Polishing and Buffing: After the clear coat has fully cured, use a high-quality automotive polishing compound and a buffer to achieve a mirror-like shine. This step can significantly enhance the final appearance.
·Avoid Overspray: Mask off surrounding areas and use a spray booth or an enclosed space to minimize overspray. Overspray can create uneven surfaces and waste clear coat.
·Use Quality Products: Invest in high-quality 2K clear coat products from reputable manufacturers. Subpar products can lead to subpar results.
·Practice on Panels: Before tackling a full vehicle, practice your technique on spare panels or test pieces to refine your skills and achieve consistency.
·Lighting: Adequate lighting is crucial for spotting imperfections during and after application. Ensure your workspace is well-lit to catch any defects early.
·Patience: Allow the clear coat ample time to cure fully. Rushing the process can result in a compromised finish. Follow the manufacturer's recommended curing times.
These tips and tricks, when combined with proper technique and attention to detail, can help you achieve a flawless finish that rivals professional automotive paint jobs.
How to Properly Cure and Protect the 2K Clear Coat
Curing and protecting the 2K clear coat are critical steps in ensuring its longevity and performance. Here's a comprehensive guide on how to do this effectively:
1.Curing:
Proper curing of the 2K clear coat is essential for achieving its full strength and durability. Follow these steps:
·Temperature and Humidity: Cure the clear coat in an environment with controlled temperature and humidity.
·Airflow: Ensure adequate airflow to help with the curing process. This prevents solvent entrapment and allows for proper outgassing.
·Curing Time: Follow the manufacturer's recommendations for curing time.
·Avoid Contamination: During the curing process, it's crucial to keep the coated surface free from contaminants, such as dust or airborne particles. Cover the area or use a clean environment to prevent contamination.
·Avoid Physical Stress: While the clear coat is curing, avoid any physical stress or contact with the surface, as it can lead to imperfections.
2.Protection:
After curing, it's essential to protect the clear coat to maintain its appearance and durability:
·Regular Cleaning: Clean the clear-coated surface regularly using a mild automotive detergent and a soft, non-abrasive cloth. Avoid harsh chemicals and abrasive materials that can damage the clear coat.
·Waxing: Apply a high-quality automotive wax or sealant to the clear coat to provide an additional layer of protection. Waxing helps maintain the shine and repel contaminants.
·Avoid Harsh Chemicals: Refrain from using abrasive or chemical cleaners that can harm the clear coat. This includes avoiding gas station car washes with harsh detergents.
·Avoid Scratches: Be cautious when handling the vehicle to prevent scratches and abrasions to the clear coat. Use soft microfiber towels and wash mitts.
·Park in Shade: Whenever possible, park the vehicle in the shade or in a covered area to shield it from UV rays and environmental contaminants.
·Regular Inspection: Periodically inspect the clear coat for any signs of damage or defects. Promptly address any issues to prevent further deterioration.
By following these steps for proper curing and protection of the 2K clear coat, you can ensure that the finish remains in excellent condition for an extended period. These measures not only preserve the aesthetic appeal of the vehicle but also maintain the clear coat's protective qualities.
Recommended Products and Tools for Applying 2K Clear Coat
To achieve a professional-grade application of 2K clear coat, it's essential to have the right products and tools at your disposal. Here are some recommended items to ensure a successful clear coat application:
2K Clear Coat Kit: Start with a high-quality 2K clear coat kit from a reputable manufacturer. These kits typically include the clear resin and activator in the correct proportions for your convenience.
Spray Gun: Invest in a quality automotive spray gun designed for clear coat application. Ensure it is compatible with the viscosity of 2K clear coat and allows for precise control of the spray pattern.
Respirator: Protect your respiratory health by using a respirator with organic vapor cartridges. This is crucial when working with 2K clear coat, as it contains chemicals that can be harmful when inhaled.
Safety Gear: Wear appropriate safety gear, including nitrile gloves and safety glasses, to shield yourself from potential chemical exposure.
Tack Cloths: Use tack cloths to remove dust and debris from the surface before applying clear coat. These sticky cloths are highly effective in ensuring a clean surface.
Sanding Materials: Stock up on various grits of sandpaper (ranging from 800 to 2000 grit) for surface preparation and wet sanding between coats. Sanding blocks and sanding sponges can also be useful for achieving a smooth surface.
Wax and Grease Remover: Have a high-quality wax and grease remover on hand to thoroughly clean the surface before clear coat application.
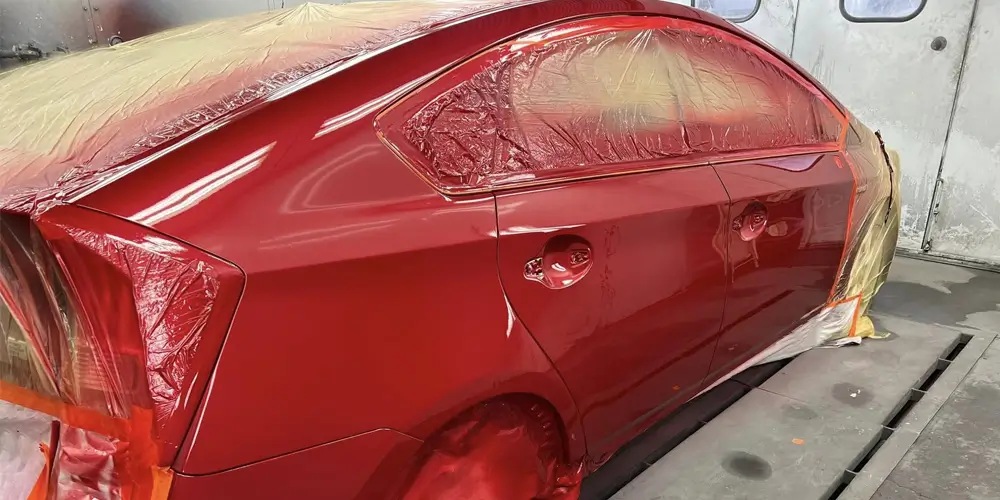
Masking Materials: Use masking tape, plastic sheeting, and paper to mask off areas you do not want to be coated with clear coat. This prevents overspray and ensures clean lines.
Buffing and Polishing Tools: Invest in a buffer and polishing compounds for achieving a mirror-like finish after the clear coat has cured.
Paint Mixing Supplies: If you're mixing your clear coat, ensure you have accurate measuring tools such as graduated mixing cups and stirring sticks.
Proper Lighting: Adequate lighting is essential for spotting imperfections during and after application. Ensure your workspace is well-lit to catch any defects early.
Spray Booth or Enclosed Space: Whenever possible, work in a controlled environment like a spray booth or enclosed space to minimize dust, overspray, and environmental factors that can affect the application.
By having these recommended products and tools in your arsenal, you'll be well-equipped to achieve professional results when applying 2K clear coat. Quality tools and materials are essential for ensuring a smooth and flawless finish.
Troubleshooting Common Issues with 2K Clear Coat Application
Even with careful preparation and application, issues can arise when applying 2K clear coat. Understanding common problems and how to troubleshoot them is essential for achieving a successful outcome. Here are some common issues and their solutions:
1.Orange Peel: Orange peel texture can occur, resulting in a rough, dimpled surface. To address this, sand the affected area with fine-grit sandpaper (1000-1500 grit) and then polish it to a smooth finish.
2.Runs and Sags: Over-application can lead to runs and sags in the clear coat. If this happens, allow the clear coat to dry completely, then sand the affected area with a fine-grit sandpaper and polish it to blend with the surrounding finish.
3.Fish Eyes: Fish eyes are small, circular craters in the clear coat caused by contaminants. To resolve this issue, sand the affected area, clean it thoroughly, and reapply clear coat using proper cleaning procedures.
4.Dry Spray: Dry spray results in a rough, grainy texture. It can be caused by incorrect air pressure or distance from the surface. Adjust your spray gun settings and technique to ensure proper atomization.
5.Cloudiness or Blushing: Cloudiness, often called blushing, occurs when clear coat appears milky or hazy. This can happen in humid conditions. To correct it, allow the affected area to dry completely and then sand it with a fine-grit sandpaper before polishing.
6.Adhesion Issues: If the clear coat doesn't adhere properly, it may peel or flake. Ensure proper surface preparation, including thorough cleaning and sanding, to improve adhesion.
7.Color Mismatch: A noticeable difference in color between the clear-coated area and the surrounding paint can occur due to improper blending. Carefully blend the clear coat into the adjacent paint for a seamless transition.
8.Solvent Pop: Solvent pop results in small bubbles in the clear coat due to trapped solvents. To fix this issue, sand the affected area, allow it to dry, and reapply clear coat while ensuring proper flash times.
9.Dust Particles: Dust particles settling on the clear coat can cause imperfections. To address this, sand the affected area lightly, clean it thoroughly, and reapply clear coat using proper dust control measures.
By recognizing and addressing these common issues, you can troubleshoot and rectify problems that may arise during the 2K clear coat application process. This ensures a professional-looking finish and customer satisfaction.
Conclusion
In conclusion, mastering the art of 2K clear coat application is a crucial skill for import wholesalers, paint shop owners, and repair center managers who aim to deliver exceptional automotive finishes. This comprehensive guide has covered every aspect of the process, from understanding the benefits of 2K clear coat to troubleshooting common issues.
By choosing 2K clear coat, you're not only ensuring exceptional durability but also enjoying the benefits of a high-gloss finish, chemical and scratch resistance, and color stability. These qualities enhance the appearance and longevity of automotive paint jobs, making it a wise investment.
Proper preparation, application, curing, and protection are essential steps in achieving a flawless finish with 2K clear coat. Armed with the right products, tools, and knowledge, you can consistently produce outstanding results that will satisfy customers and elevate your reputation in the industry.
Remember that 2K clear coat application is both an art and a science. It requires attention to detail, patience, and ongoing practice to hone your skills. With dedication and the guidance provided in this comprehensive guide, you can confidently achieve showroom-quality finishes and leave a lasting impression on every vehicle you touch.
Source of this article:https://www.supersybon.com
Get to know us through more channels:

